How to integrate an SDK
Hello World Tutorial With External SDKs
Introduction
This tutorial is aimed at PlentyONE users who completed the first Hello World Tutorial, and want to integrate an external SDK into their plugin. By integrating an external SDK and adding a dependency between your plugin and a repository on Packagist, you can access the functionality of the external SDK. Here you can find the github repository for this plugin in the branch h
External SDKs will not be executed in PlentyONE directly. We separated the code of an external SDK from the PlentyONE plugin code for security reasons. The code of the external SDK is executed on another server that is not connected to the PlentyONE servers. |
Let’s take a look at the result first, to see what we want to implement.

First File
The first thing that we are going to do is create a plugin.json, which contains all information about our plugin, that we need. This is the same as in base Hello World tutorial. We extend it with a dependency.
{
      "name":"HelloWorld", (1)
      "description":"My first plugin", (2)
      "namespace":"HelloWorld", (3)
      "author":"PlentyONE GmbH", (4)
      "type":"template", (5)
      "serviceProvider":"HelloWorld\\Providers\\HelloWorldServiceProvider", (6)
      "dependencies" : {
            "guzzlehttp/guzzle": "6.3.*" (7)
      }
}| 1 | This is the name of our plugin. This is also how it will be displayed in the repository. |
| 2 | A description for our plugin |
| 3 | We recommend that you use the name of the plugin folder as the namespace root. This service provider is the central location to register services in the plugin. |
| 4 | The Author of the plugin, your company name or your personal name. |
| 5 | The type of the plugin, for now accept, that this is a template, there are also other type, which we will explain later. |
| 6 | The namespace of our ServiceProvider (We haven’t created it yet) |
| 7 | We add the new attribute dependencies. The value for this attribute consists of the repository name on Packagist, here guzzlehttp/guzzle and the required version, e.g. version 6.3.*. The asterisk means that any version starting with 6.3, e.g. 6.3.0, 6.3.1 or 6.3.2, is fine. |
Folder Structure
Furthermore we will now present you the structure including all the files, that we will need for our Hello World Plugin. In order to integrate the external SDK, we have to make changes to the following existing files. We also have to add a new folder with a new file:
-
Update the plugin.json
-
Create the resources/lib folder and add the guzzle_connector.php file
-
Extend the ContentController.php
-
Extend the hello.twig
HelloWorld/
  resources/
    lib/
      guzzle_connector.php (1)
    views/
      content/
        hello.twig
  src/
    Providers/
      HelloWorldRouteServiceProvider.php
      HelloWorldServiceProvider.php
    Controllers/
      ContentController.php
  plugin.json
| 1 | This is the file that we have added. The guzzle_connector will execute it. |
Creating the guzzle_connector.php
External PHP code can only be executed in PHP files that are saved in the lib folder. So, we create a new PHP file that will be the link between the PlentyONE plugin API and an external API.
We take the code example from Guzzle and make some adaptions so that the code fits our needs. Remember that we want to send an HTTP request to the Packagist API. Let’s search packages by name.
<?php

$client = new \GuzzleHttp\Client();
$res = $client->request(
    'GET', (1)
    'https://packagist.org/search.json', (2)
    [
        'query' => ['q' => SdkRestApi::getParam('packagist_query')] (3)
    ]
);

/** @return array */
return json_decode($res->getBody(), true); (4)| 1 | In the request function, we state the HTTP method and <2> the URL |
| 2 | we use the request option query to add a query string to the request. |
| 3 | We return the requested JSON data in decoded form. Note that if a string is returned, it must be UTF-8 encoded. |
|
SdkRestApi is a helper class that enables the communication between PlentyONE plugins and external SDKs. This class provides information about the requests sent by the plugin. In the getParam function of our query, we use packagist_query. This variable will be described in the code explanation of our ContentController. |
Extending the ContentController
As we want to display more data we will have to modify the ContentController. In order to execute the previously created PHP file, we need to enable HTTP requests in the ContentController, add functionality to address the PHP response and process the returned data.
<?php

namespace HelloWorld\Controllers;

use Plenty\Plugin\Controller;
use Plenty\Plugin\Templates\Twig;
use Plenty\Modules\Plugin\Libs\Contracts\LibraryCallContract; (1)
use Plenty\Plugin\Http\Request; (2)

/**
 * Class ContentController
 * @package HelloWorld\Controllers
 */
class ContentController extends Controller
{
	/**
	 * @param Twig $twig
	 * @param LibraryCallContract $libCall
	 * @param Request $request
	 * @return string
	 */
	public function sayHello(
		Twig $twig,
		LibraryCallContract $libCall, (1)
		Request $request (2)
	)
	{

		$packagistResult = (3)
			$libCall->call( (4)
				'HelloWorld::guzzle_connector',
				['packagist_query' => $request->get('search')] (5)
			);
		return $twig->render('HelloWorld::content.hello', ['packagistResult' => $packagistResult]); (6)
	}
}| 1 | We add the Request dependency. It allows us to obtain an instance of the current HTTP request in sayHello(). |
| 2 | LibraryCallContract is used for addressing our PHP file and processing the response. |
| 3 | This variable stores the result of our Packageist search. |
| 4 | The call() method requires the $libCall parameter and an array of request parameters. In $libCall, we state that our connector is located in the HelloWorld plugin: HelloWorld::guzzle_connector. |
| 5 | In the array of request parameters, we take up packagist_query and assign the $request parameter to it. This param allows us, to request any search term by adding search to our URL. |
| 6 | The $packagistResult is then passed to the render function and available in our template. |
|
Note that, we cannot directly return classes because the PlentyONE plugin interface is not familiar with these classes. We can only return simple data types or objects with an API that returns the objects as a JSON string. |
Making a request
We mentioned above that we want to search Packagist packages by name. So when sending the HTTP request to https://packagist.org/search.json?q=plentymarkets to get all packages with the name plentymarkets, e.g. with Postman, we receive the following response consisting of the results array and the total number of packages:
{
   "results":[
      {
         "name":"composer\/installers",
         "description":"A multi-framework Composer library installer",
         "url":"https:\/\/packagist.org\/packages\/composer\/installers",
         "repository":"https:\/\/github.com\/composer\/installers",
         "downloads":32907230,
         "favers":1310
      },
      {
         "name":"repat\/plentymarkets-rest-client",
         "description":"REST Client for Plentymarkets",
         "url":"https:\/\/packagist.org\/packages\/repat\/plentymarkets-rest-client",
         "repository":"https:\/\/github.com\/repat\/plentymarkets-rest-client",
         "downloads":1332,
         "favers":13
      },
      ...
   ],
   "total":19,
   "next":"https:\/\/packagist.org\/search.json?q=plentymarkets\u0026page=2"
}
If there’s an error, you will receive the following response instead:
array(6) {
  'error' =>
    bool(true)
  'error_no' =>
    int(404)
  'error_msg' =>
    string(10) "error msg"
  'error_file' =>
    string(10) "/path/to/lib/file"
  'error_line' =>
    int(11)
  'lib_call_response' =>
    NULL
}
Extending the TWIG template
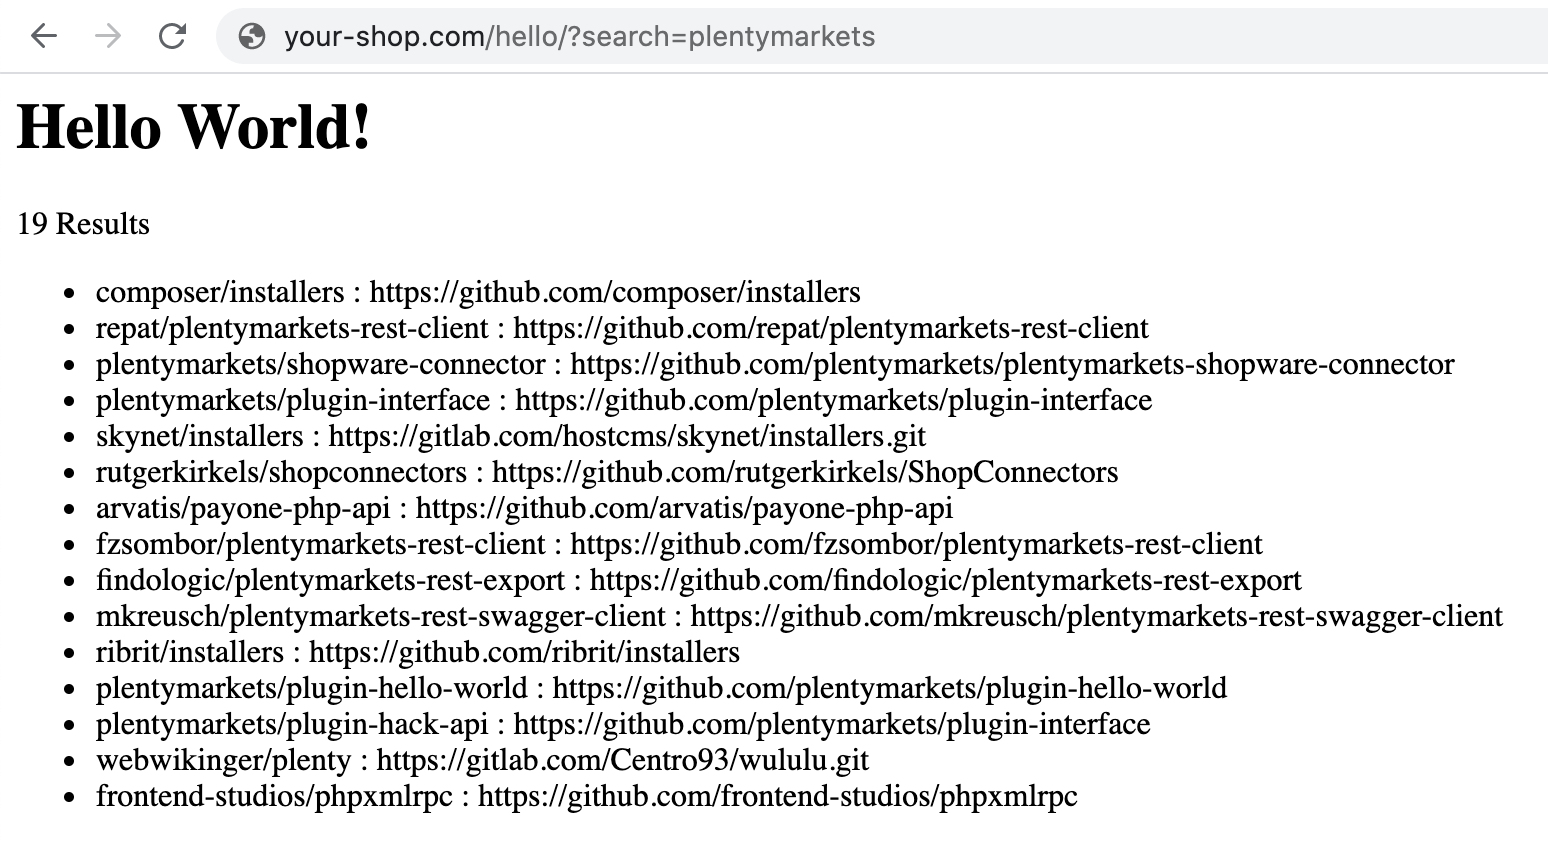
In our TWIG template we don’t need all the information of the JSON response. We only want to display the total number of packages, the package name and the package repository. If no packages were found, we want to display the text No entries.
<h1>Hello World!</h1>

<p>{{ packagistResult.total }} Results</p> (1)
<ul>
    {% for packagistItem in packagistResult.results %} (2)
        <li>{{ packagistItem.name }} : {{ packagistItem.repository }}</li> (3)
    {% else %} (4)
        <li>No entries</li> (5)
    {% endfor %}
</ul>| 1 | We defined packagistResult in the ContentController. It contains the information of our HTTP response. We use the variable {{ packagistResult.total }} to render the total number of results. |
| 2 | In this loop, we loop over each item in the results array. |
| 3 | We list each package in the browser with name and repository by using the variables {{ packagistResult.name }} and {{ packagistResult.repository }}. |
| 4 | The {% else %} clause will render, if no iteration took place because the sequence was empty. |
| 5 | So we display No entries. |
Searching for packages
Now we deploy the plugin in a PluginSet. Now, we are able to search for packages via the address bar of the browser. Open your browser and go to www.your-plentystore.com/hello. The template will be rendered and an empty result list will be displayed.
By adding ?search=plentymarkets to the URL, we will send an HTTP request to Packagist that returns all packages with the search word PlentyONE The items of the result will be rendered in the result list. Requests are limited to prevent an overflow of queries.
|
Once you have changed the files in your local |
Bonus: Styling the result
With additional styling we can improve the user experience of our plugin. So let’s add a searchbar and a fancy user interface. You can access this result in the same git repository in the hello-world-sdk-fancy branch.

For this result we will have to add a CSS and a JavaScript file. Therefor we add a css folder with `fancy.css in it and a `buttonlistener.js in a js folder inside resources.
HelloWorld/
  resources/
    css/ (1)
      fancy.css
    js/ (2)
      buttonlistener.js
    lib/
      guzzle_connector.php (1)
    views/
      content/
        hello.twig
  src/
    Providers/
      HelloWorldRouteServiceProvider.php
      HelloWorldServiceProvider.php
    Controllers/
      ContentController.php
  plugin.json
| 1 | The new css folder, with fancy.css in it. |
| 2 | The new js folder, with our JavaScript code. |
Let’s take a look at the new hello.twig file
<!DOCTYPE html>
<html>
<head>
    <link rel="stylesheet" href="{{ plugin_path('HelloWorld') }}/css/fancy.css"> (1)
    <script type="text/javascript"  src="{{ plugin_path('HelloWorld') }}/js/buttonlistener.js"></script>  (2)
</head>
<body>
<h1>Hello Fancy World!</h1>

<div class="wrap">
    <div class="search">
        <input id="searchTerm" type="text" class="searchTerm" placeholder="What packages are you looking for?"> (3)
        <button id="searchButton" type="submit" class="searchButton"> (4)
            <svg xmlns="http://www.w3.org/2000/svg" xmlns:xlink="http://www.w3.org/1999/xlink" version="1.1" (5)
                 id="Layer_1" x="0px" y="0px" width="25px" height="25px" viewBox="0 0 122.879 119.799"
                 enable-background="new 0 0 122.879 119.799" xml:space="preserve"><g>
                    <path d="M49.988,0h0.016v0.007C63.803,0.011,76.298,5.608,85.34,14.652c9.027,9.031,14.619,21.515,14.628,35.303h0.007v0.033v0.04 h-0.007c-0.005,5.557-0.917,10.905-2.594,15.892c-0.281,0.837-0.575,1.641-0.877,2.409v0.007c-1.446,3.66-3.315,7.12-5.547,10.307 l29.082,26.139l0.018,0.016l0.157,0.146l0.011,0.011c1.642,1.563,2.536,3.656,2.649,5.78c0.11,2.1-0.543,4.248-1.979,5.971 l-0.011,0.016l-0.175,0.203l-0.035,0.035l-0.146,0.16l-0.016,0.021c-1.565,1.642-3.654,2.534-5.78,2.646 c-2.097,0.111-4.247-0.54-5.971-1.978l-0.015-0.011l-0.204-0.175l-0.029-0.024L78.761,90.865c-0.88,0.62-1.778,1.209-2.687,1.765 c-1.233,0.755-2.51,1.466-3.813,2.115c-6.699,3.342-14.269,5.222-22.272,5.222v0.007h-0.016v-0.007 c-13.799-0.004-26.296-5.601-35.338-14.645C5.605,76.291,0.016,63.805,0.007,50.021H0v-0.033v-0.016h0.007 c0.004-13.799,5.601-26.296,14.645-35.338C23.683,5.608,36.167,0.016,49.955,0.007V0H49.988L49.988,0z M50.004,11.21v0.007h-0.016 h-0.033V11.21c-10.686,0.007-20.372,4.35-27.384,11.359C15.56,29.578,11.213,39.274,11.21,49.973h0.007v0.016v0.033H11.21 c0.007,10.686,4.347,20.367,11.359,27.381c7.009,7.012,16.705,11.359,27.403,11.361v-0.007h0.016h0.033v0.007 c10.686-0.007,20.368-4.348,27.382-11.359c7.011-7.009,11.358-16.702,11.36-27.4h-0.006v-0.016v-0.033h0.006 c-0.006-10.686-4.35-20.372-11.358-27.384C70.396,15.56,60.703,11.213,50.004,11.21L50.004,11.21z"/>
                </g></svg>
        </button>
    </div>
</div>

<p>{{ packagistResult.total }} Results</p>
<ul>
    {% for packagistItem in packagistResult.results %}
        {% set counter = ( counter | default(0) ) + 1 %} (6)

        <li style="--animation-order: {{ counter }}"><a href="{{ packagistItem.repository }} " target="_blank"><span (7)
                        class="align-left">{{ packagistItem.name }}</span> <span
                        class="align-right">💾 {{ packagistItem.downloads }} ⭐️ {{ packagistItem.favers }}</span></a></li>
    {% else %}
        <li>No entries</li>
    {% endfor %}
</ul>
</body>| 1 | In this line we add our css into the document by providing the path. With {{ plugin_path('HelloWorld') }} we specify the base path of our HelloWorld plugin, which will be used. |
| 2 | This line is the same for our custom JavaScript. |
| 3 | We add an input searchbar and |
| 4 | a search button |
| 5 | with an svg. To show its for searching. |
| 6 | With this command we set up a counter, which will be used for our fancy css animation. Basically for every <li> element in this for loop we increase the counter by one. starting at 0. |
| 7 | By adding --animation-order: {{ counter }} this as a style to every <li> we can define a specific time every single one of them is going to appear. We will do this with CSS. |
Let’s take a look at the part of our CSS responsible for the animation.
li {
    ...
    animation-name: animateIn; (1)
    animation-duration: 350ms;
    animation-delay: calc(var(--animation-order) * 50ms + var(--animation-order) * var(--animation-order) * 5ms ); (2)
    animation-fill-mode: both;
    animation-timing-function: ease-in-out;
}

@keyframes animateIn { (3)
    0% {
        opacity: 0;
        transform: scale(0.6) translateY(-8px);
    }

    100% {
        opacity: 1;
    }
}| 1 | Here we define the kind of aimation of <li> elements will take. |
| 2 | Here we use the --animation-order we defined for every `<li> element to delay the results. Every Listelemet comes with 50ms. Furthermore the delay increases for every element. Increasing the delay the --animation-order increases. Resulting in a nice effect. |
| 3 | This is the actual animation function. We start with an invisible element with the opacity of 0 and a smaller scale. We increse the opacity to 1 in the last frame. |
document.addEventListener('DOMContentLoaded', function () { (1)
    console.log('document is ready. I can sleep now');
    let search = (new URL(document.location)).searchParams.get("search");
    document.getElementById("searchTerm").value = search ? decodeURI(search) : ""; (2)

    document.getElementById("searchButton").addEventListener("click", function () { (3)
        let url = (new URL(document.location));
        let search_params = (new URL(document.location)).searchParams; (4)
        let search_val = document.getElementById("searchTerm").value;
        search_params.set('search', encodeURI(search_val)); (5)
        url.search = search_params.toString();
        url = url.toString();
        window.location.href = url; (6)
    });
});
}| 1 | Here we add a listener to check when the DOMContent of the site is loaded. |
| 2 | Once this is the case we set the value of our input-field to the current searchTerm or to an empty string. |
| 3 | This is an EventListener checking, whether the search Button has been clicked. |
| 4 | This is the function to get the current search parameter of the URL. |
| 5 | Here we set the parameter search to an encoded value of the search term. It is encoded to exclude special characters and make it a valid URL. |
| 6 | Here we set the newly created URL as the URL in the current browser window to start the search process. |
Have fun creating new plugins and improving the experience of your customers.