How to create a back end UI
|
The Terra-Components and the Plugin Terra-Basic have been deprecated and will no longer be maintained. Although you can still work with them, we recommend using Material components instead. |
In this how-to guide, you will learn how to create a back end UI by using Angular. In the first part, you will be shown how to start an Angular UI project for your plugin.
The instructions given on this page require that you have established your IDE and created your first plugins.
If you’re new to Angular, check out the angular.io tutorial: Tour of Heroes.
Downloading the plugin
First of all, you need to download the Terra-Basic plugin, which you will use as a template throughout this how-to guide. It includes a basic Angular application and all packages you’re going to use. The Terra Components are already installed as well.
Download or clone the plugin on GitHub.
Setting up Node.js
Node.js is required to compile the project. To set it up, proceed as follows:
-
Install the LTS version.
-
Open your command line. This is the terminal on macOS and Linux, or the Command Prompt on Windows.
-
Run node -v.
→ If Node.js was installed correctly, the command line displays the installed version.
Compiling the project
To compile the project, carry out the following steps:
-
Change directory to the directory of your project.
-
Run
npm install.
→ All dependencies of the package.json file are installed. -
Run
npm start.
→ The project is compiled and shown in your browser onlocalhost:3002.
You can change the port in the file /plugin-terra-basic/config/webpack.dev.js.
Creating the PHP environment
Now you need to deploy the UI part in the PHP environment. For this, use the compiled Plugin Terra-Basic as UI part in your plugin and proceed as follows:
-
To compile the UI project, run
npm run build.
→ Thedistdirectory is created with the compiled files in it. -
Copy and paste the content of the
distdirectory to your plugin project’suidirectory.
Once you have completed these steps, set up the ui.json file with actions for the different views.
For being able to test your copied UI within the plugin, you can install the extension Allow-Control-Allow-Origin in the Chrome browser. Alternatively, you can use plentyDevTool to test the UI in any browser.
Creating the ui.json
Next, create the ui.json
{
 "defaultEntryPoint": "index.html",
 "namespace": "MyPlugin",
 "menuEntries": [
   {
     "label": "Settings",
     "menu": "settings/orders/myplugin",
     "urlKey": "basic-settings",
     "entryPoint": "index.html?action=basic-settings"
   },
   {
     "label": "Address settings",
     "menu": "settings/orders/myplugin",
     "urlKey": "address-settings",
     "entryPoint": "index.html?action=address-settings"
   },
   {
     "label": "Shipping settings",
     "menu": "settings/orders/myplugin",
     "urlKey": "shipping-settings",
     "entryPoint": "index.html?action=shipping-settings"
   }
 ]
}
At this point, you’ve set up the basic structure of your plugin and compiled the project. This concludes the preparation. You can now start implementing the plugin’s functionality.
Creating a local test environment
In the next step, set up a local test environment. This will allow you to check the UI in the browser. To do so, proceed as follows:
-
Open your IDE.
-
Go to File » Open.
-
Open the Plugin-Terra-Basic folder.
For the actual setup, carry out the following steps:
-
Open the terminal.
-
Run the command
cd /your-dir/plugin-terra-basicto navigate to the Plugin-Terra-Basic directory. -
Run
npm installto install all required packages. This may take some time. -
Run
ng serveto start your local test server.
You can now view your project in your browser on localhost:3002. You can change the port in the file /plugin-terra-basic/angular.json.
Creating a new view
To create a new view, use Angular’s CLI.
If you have globally installed the CLI, you can use it with ng [command] [parameter]. Otherwise, you can use it via npx ng [command] [parameter].
NgModule
NgModule defines a module that contains components, directives, pipes and providers. If you use the Angular CLI to create components, directives etc. the entries are added automatically. Otherwise, you have to add it manually in the right section.
Creating a new component
Next, create a new component and add it to the routing file and the menu. This lets you access the plugin UI. To do so, proceed as follows:
-
Run the command
ng generate component views/my-new-view.
→ This command generates all necessary files inplugin-terra-basic/src/app/views/my-new-viewand adds the component to the closest module - in this casePluginTerraBasicModule.
The following files will be generated:
-
my-new-view.component.html → Template file for your html Code
-
my-new-view.component.scss → Styles for your template. Supports scss Format. Delete this and the
styleUrlsentry in the .ts file if you have no custom styles. -
my-new-view.component.spec.ts → File for unit testing
-
my-new-view.component.ts → Here goes your view logic
The generated my-new-view.component.ts file looks like the following:
import { Component, OnInit } from '@angular/core';

@Component({
  selector: 'ptb-my-new-view',
  templateUrl: './my-new-view.component.html',
  styleUrls: ['./my-new-view.component.scss']
})
export class MyNewViewComponent implements OnInit {

  constructor() { }

  ngOnInit(): void {
  }

}
Navigation
Next, implement some logic to navigate to a different view. You need to create a new route for this. To do so, proceed as follows:
-
Open
src/app/plugin-terra-basic.routing.ts. -
Add the following to the
plugin-terra-basic.routing.tsright after the entry forExampleViewComponent.
import {MyNewViewComponent} from './views/my-new-view/my-new-view.component';
{
                path: 'my-new-view',
                component: MyNewViewComponent,
                data: {
                    label: 'My New View'
                }
            }
Adding a menu entry
To create a new menu entry, use TerraNodeTree. This component defines a tree structure made up of nodes that can be used to render a multi-level menu tree.
To do so, add the following to the ngOnInit() method in main-menu.component.ts.
The menu entries are shown in the order in which they are added.
this._treeConfig.addNode({
            id: 'my-new-view',
            name: this.translation.translate('my-new-view'),
            isVisible: true,
            isActive: this.router.isActive('plugin/my-new-view', true),
            onClick: (): void => {
                this.router.navigateByUrl('plugin/my-new-view');
            }
        });
Adding table and filter
Next, add a table and a filter that will appear when clicking on your new menu entry.
To do so, open src/app/views/my-new-view/my-new-view.component.html and replace the html code as explained below.
<terra-2-col mobileRouting> (1)
                    <ptb-main-menu left></ptb-main-menu>
                    <ptb-overview-view right></ptb-overview-view>
</terra-2-col> (1)| 1 | Replace the automatically generated html code with the one shown below. The terra-2-col tag separates the screen into two parts (left and right). |
Adding a service
In this step you will create a service to provide your table with data from the database.
Open the src/app/services folder. It already contains the contact.service.ts file. To create a new service you can use ng generate service and then enter services/contact when prompted for a name, or by creating it manually. When using the generate option, you will also be provided with a spec file which you can use to create tests.
import { Injectable } from '@angular/core';
import { HttpClient } from '@angular/common/http';
import { ContactInterface } from '../interfaces/contact.interface';
import { Observable } from 'rxjs/internal/Observable';
import { createHttpParams, TerraPagerInterface } from '@plentymarkets/terra-components';

@Injectable()
export class ContactService {
    private readonly url: string = 'http://master.login.plentymarkets.com/rest/accounts/contacts';

    constructor(private http: HttpClient) {}

    public getContacts(requestParams: any): Observable<TerraPagerInterface<ContactInterface>> {
        return this.http.get<TerraPagerInterface<ContactInterface>>(this.url, {
            params: createHttpParams(requestParams)
        });
    }
}
To use the service and be able to send REST calls, you need to get an authentication token. To do so, proceed as follows:
-
Log in to your PlentyONE system.
-
Open your browser dev tools.
-
Right click and click on
Inspect. -
Go to
Application. -
Open
Local Storage. -
Click on your connection example: http://master.login.plentymarkets.com.
→ This will open a list where you can copy theaccessToken. -
Open
plugin-terra-basic.component.tsand go toline 17. -
Paste the copied token into the
accessTokenvariable.
Tip: To avoid errors while accessing theaccessToken, use the Allow-Control-Allow-Origin plugin.
→ You are ready to use the service.
|
Token changes when login expires
Note that the token will change every time your login session expires. This means you may have to repeat this step several times during the course of development. |
Linking your service to the module
If you used the generate option, the service should be added to the module automatically.
If not, you may need to add it to the NgModule manually.
import {
                   APP_INITIALIZER,
                   NgModule
               } from '@angular/core';
               import { BrowserModule } from '@angular/platform-browser';
               import { PluginTerraBasicComponent } from './plugin-terra-basic.component';
               import { StartComponent } from './views/start/start.component';
               import { HttpModule } from '@angular/http';
               import {
                   L10nLoader,
                   TranslationModule
               } from 'angular-l10n';
               import { FormsModule } from '@angular/forms';
               import { l10nConfig } from './core/localization/l10n.config';
               import { HttpClientModule } from '@angular/common/http';
               import { RouterModule } from '@angular/router';
               import {
                   appRoutingProviders,
                   routing
               } from './plugin-terra-basic.routing';
               import { StartViewComponent } from './views/start-view.component';
               import { RouterViewComponent } from './views/router/router-view.component';
               import { MainMenuComponent } from './views/menu/main-menu.component';
               import {
                   httpInterceptorProviders,
                   TerraComponentsModule,
                   TerraNodeTreeConfig
               } from '@plentymarkets/terra-components';
               import { TableComponent } from './views/example/overview/table/table.component';
               import { FilterComponent } from './views/example/overview/filter/filter.component';
               import { OverviewViewComponent } from './views/example/overview/overview-view.component';
               import { BrowserAnimationsModule } from '@angular/platform-browser/animations';
               import { TranslationProvider } from './core/localization/translation-provider';
               import { BasicTableService } from './services/basic-table.service';
               import { ExampleViewComponent } from './views/example/example-view.component';
               import { ContactService } from './services/contact.service'; (1)

               @NgModule({
                   imports:      [
                       BrowserModule,
                       BrowserAnimationsModule,
                       HttpModule,
                       FormsModule,
                       HttpClientModule,
                       TranslationModule.forRoot(l10nConfig, { translationProvider: TranslationProvider }),
                       RouterModule.forRoot([]),
                       TerraComponentsModule,
                       routing
                   ],
                   declarations: [
                       PluginTerraBasicComponent,
                       RouterViewComponent,
                       MainMenuComponent,
                       StartViewComponent,
                       StartComponent,
                       TableComponent,
                       FilterComponent,
                       OverviewViewComponent,
                       ExampleViewComponent
                   ],
                   providers:    [
                       {
                           provide:    APP_INITIALIZER,
                           useFactory: initL10n,
                           deps:       [L10nLoader],
                           multi:      true
                       },
                       httpInterceptorProviders,
                       appRoutingProviders,
                       TerraNodeTreeConfig,
                       BasicTableService,
                       ContactService, (2)
                   ],
                   bootstrap:    [
                       PluginTerraBasicComponent
                   ]
               })
               export class PluginTerraBasicModule
               {
                   constructor(public l10nLoader:L10nLoader)
                   {
                       this.l10nLoader.load();
                   }
               }

               function initL10n(l10nLoader:L10nLoader):Function
               {
                   return ():Promise<void> => l10nLoader.load();
}| 1 | Import the service. |
| 2 | Add the service to providers. |
Using the DataSource for the Plugin Terra-Basic
The Terra-Components provide you with the base class of a fully functional DataSource that can be used in the DataSource for your table. It’s called TerraTableDataSource. To use it, proceed as follows:
-
Provide a generic type for it.
-
Inject the service from which you will get the data in your created data-sources constructor.
-
In the request method of your DataSource, return an observable of the type TerraPagerInterface<type specified for the DataSource> if you want a paginated result or just of the generic type which emits your data.
→ Later, you can use this DataSource in your mat-table to display your data.
An example is provided in the plugin Terra-Basic:
import { RequestParameterInterface, TerraPagerInterface, TerraTableDataSource } from '@plentymarkets/terra-components';
import { ContactInterface } from '../../../../interfaces/contact.interface';
import { Observable } from 'rxjs';
import { ContactService } from '../../../../services/contact.service';
export class ContactsDataSource extends TerraTableDataSource<ContactInterface> {
constructor(private contactService: ContactService) {
super();
}
public request(requestParams: RequestParameterInterface): Observable<TerraPagerInterface<ContactInterface>> {
return this.contactService.getContacts(requestParams);
}
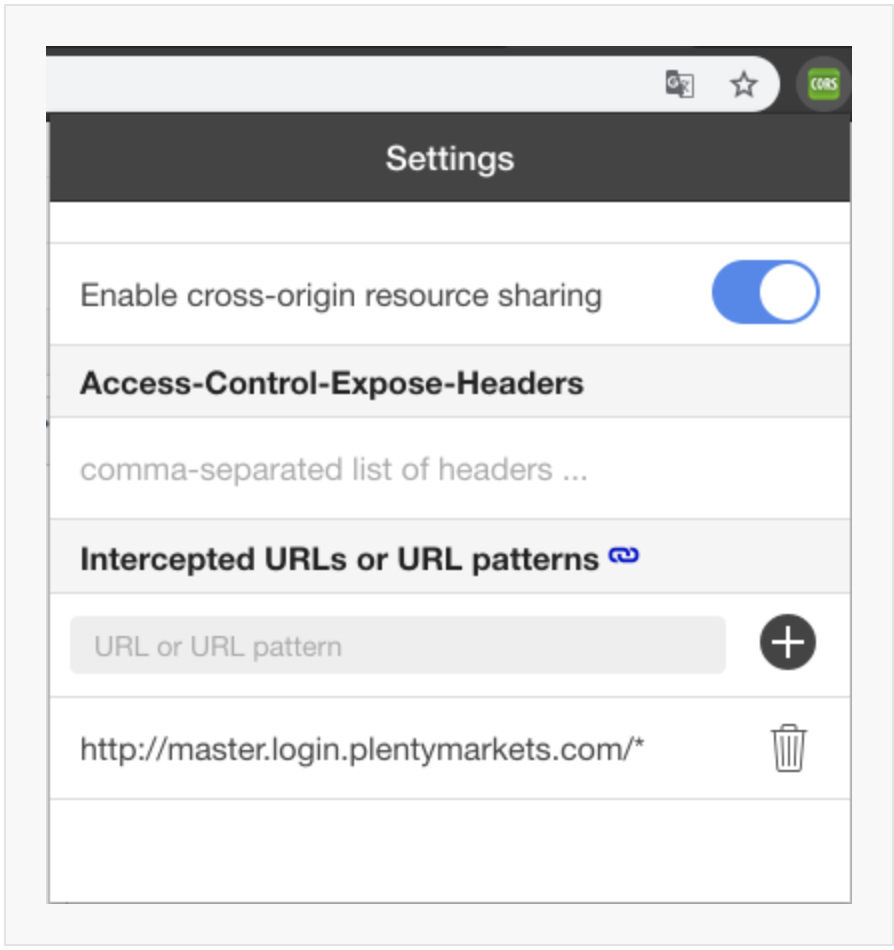
}Enabling cross origin
If you get errors due to cross origin resource sharing, you need to allow it by using a plugin. For example the Allow-Control-Allow-Origin in Chrome. Activate the plugin and allow all resources from your test system domain.
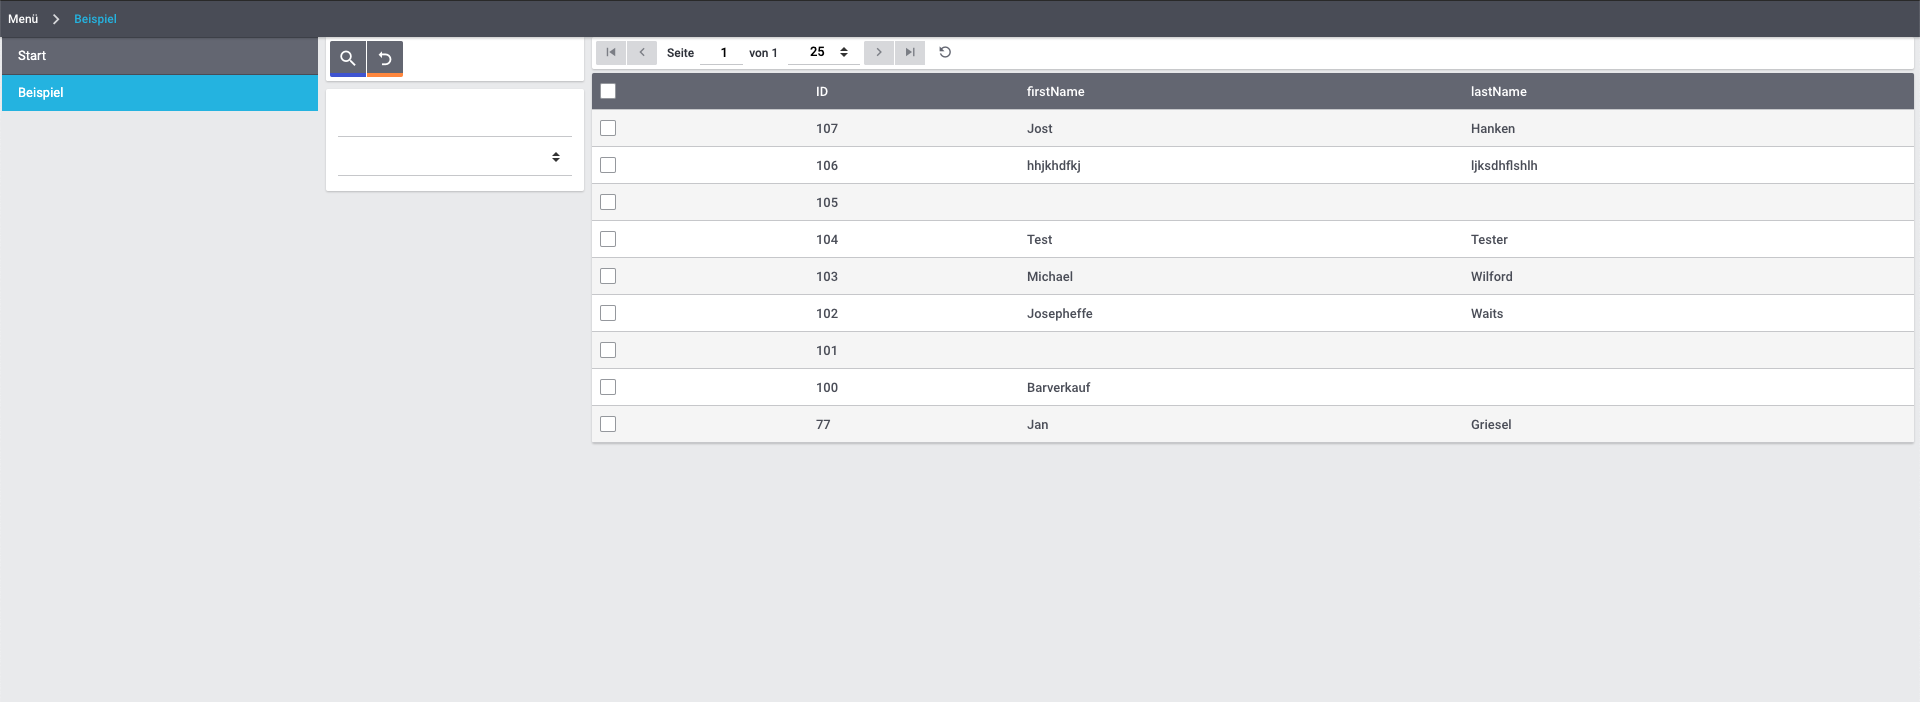
At this point of the how-to guide, your Angular UI should look like this:
Disabling back end caching
To disable caching in the PlentyONE back end, carry out the following steps:
-
Go to Setup » Settings » Developer.
-
In the Run backend without PHP-OPcache section, switch on the toggle.
→ The cache is disabled.
A red label in the bottom left corner indicates that the cache is disabled. To enable caching again, switch off the toggle or hover over the label and click on Close.
Find out more
If you want to find out more, refer to the information listed below.
-
Download or clone the complete plugin guide at Github.
-
Find a public repository with a plugin written in Angular. You can find the corresponding
ui.jsonin the main Etsy plugin.